
All products in this post purchased by me. All opinions are my own.
Hello friends! One of my favorite cruelty-free makeup brands at the drugstore is Wet n Wild. The very first lipstick I purchased with my own money was from this brand so it has a special place in my heart. This brand has grown so much over the years and offers some of the most affordable products with a truly impressive product range.
When I decided to do a one brand tutorial, I had multiple options in my stash to choose from. I decided on Wet n Wild because this brand is both easily accessible and affordable.
Here is a tutorial teaching you one of the many ways to get Wet n Wild:

For my base, I used a few products from the Wet n Wild Coverall line.
With a damp sponge, I applied the primer from this line which is a white creamy base that dries clear on the skin. With the same sponge, I applied the brand's Coverall Cream Foundation, and spot concealed by dipping a small brush into the Coverall Coverstick in #801 Light. To hide my dark circles, I chose the new mega Cushion Color Corrector in Peach, applying it with a brush, rather than the enclosed air puff.

Next, I groomed and filled in my brows with my new Retractable Brow Pencil in Taupe. For more coverage under my eyes, and to highlight the center of my face, I chose Come Correct Celebrity Concealer in Fair. This is a thick creamy concealer that comes in a squeeze tube, rather than a stick. I am not sure if they still make this, but I love it so much, that I bought a ton of backups in case they ever discontinue it. After squeezing some product onto the back of my hand, I dipped in a small flat brush and painted it onto the parts of my face that I wanted to be the lightest. I used a precision kabuki to blend under my eyes. Using a flat topped, dense brush, I buffed everything into the skin for a smooth look.
To set everything, I used the light side of the Wet n Wild megaglo Contouring Palette in Dulce De Leche, applying the powder with a slightly damp sponge. On the other side of the sponge, I applied the powder contour from the same palette.
Using one of the Wet n Wild new Megaglo Makeup Sticks for blush (#802A Hustle & Glow) I was able to simply dot the product on straight from the stick, and blend it in with a brush for a flawless look.

Next, I went to work on my eyes. Using a small eyeshadow brush from Wet n Wild, I picked up a beautiful copper color (labeled eyelid) from their trio Dancing In The Clouds and applied it to my eyelid using a packing motion. I then took a clean blending brush with no product on it and blended the edges. Using a small pencil brush, I took this color along the lower lash line as well.

To add more light to the center of the lid, without creating a true halo effect, I picked up the antique gold (labeled browbone) in this trio and using the other side of my flat shadow brush pressed the pigment into the center of my eyelids, concentrating the color closest to the lashes, and then blending all edges into the copper shadow so that they do not look like two separate colors on the eye. I did the blending on my eyelid using the flat brush, and used a clean fluffy brush along the edges. This technique helps the gold and copper kind of fuse together, creating more dimension to the look.

For my crease color, I grabbed one of my mini six-pan coloricon palettes, called California Roll. With a fluffy brush, I picked up just a tiny bit of the red color in this palette and swept it along the socket, blending away any harsh edges with a clean brush.
I realize they may not make these eyeshadows anymore as Wet n Wild recently revamped all of their eyeshadow palettes. However, the palettes I chose were pretty popular, so you should be able to find them online if you don't already own them. Otherwise, I intentionally used colors that are very dupeable. If you need suggestions on similar colors, please let me know.
Using a very fine tipped brush that I picked up at an art store, I applied a very thin line of Wet n Wild's creme eyeliner in Carbon My Reach along the upper lashes. This eyeliner works quite well for tightlining, so I took it underneath the lashes on top, and continued along pulling it out slightly to create a very thin wing.This is one of their truly standout items, as it performs the same, if not better than many high-end liners I have tried.
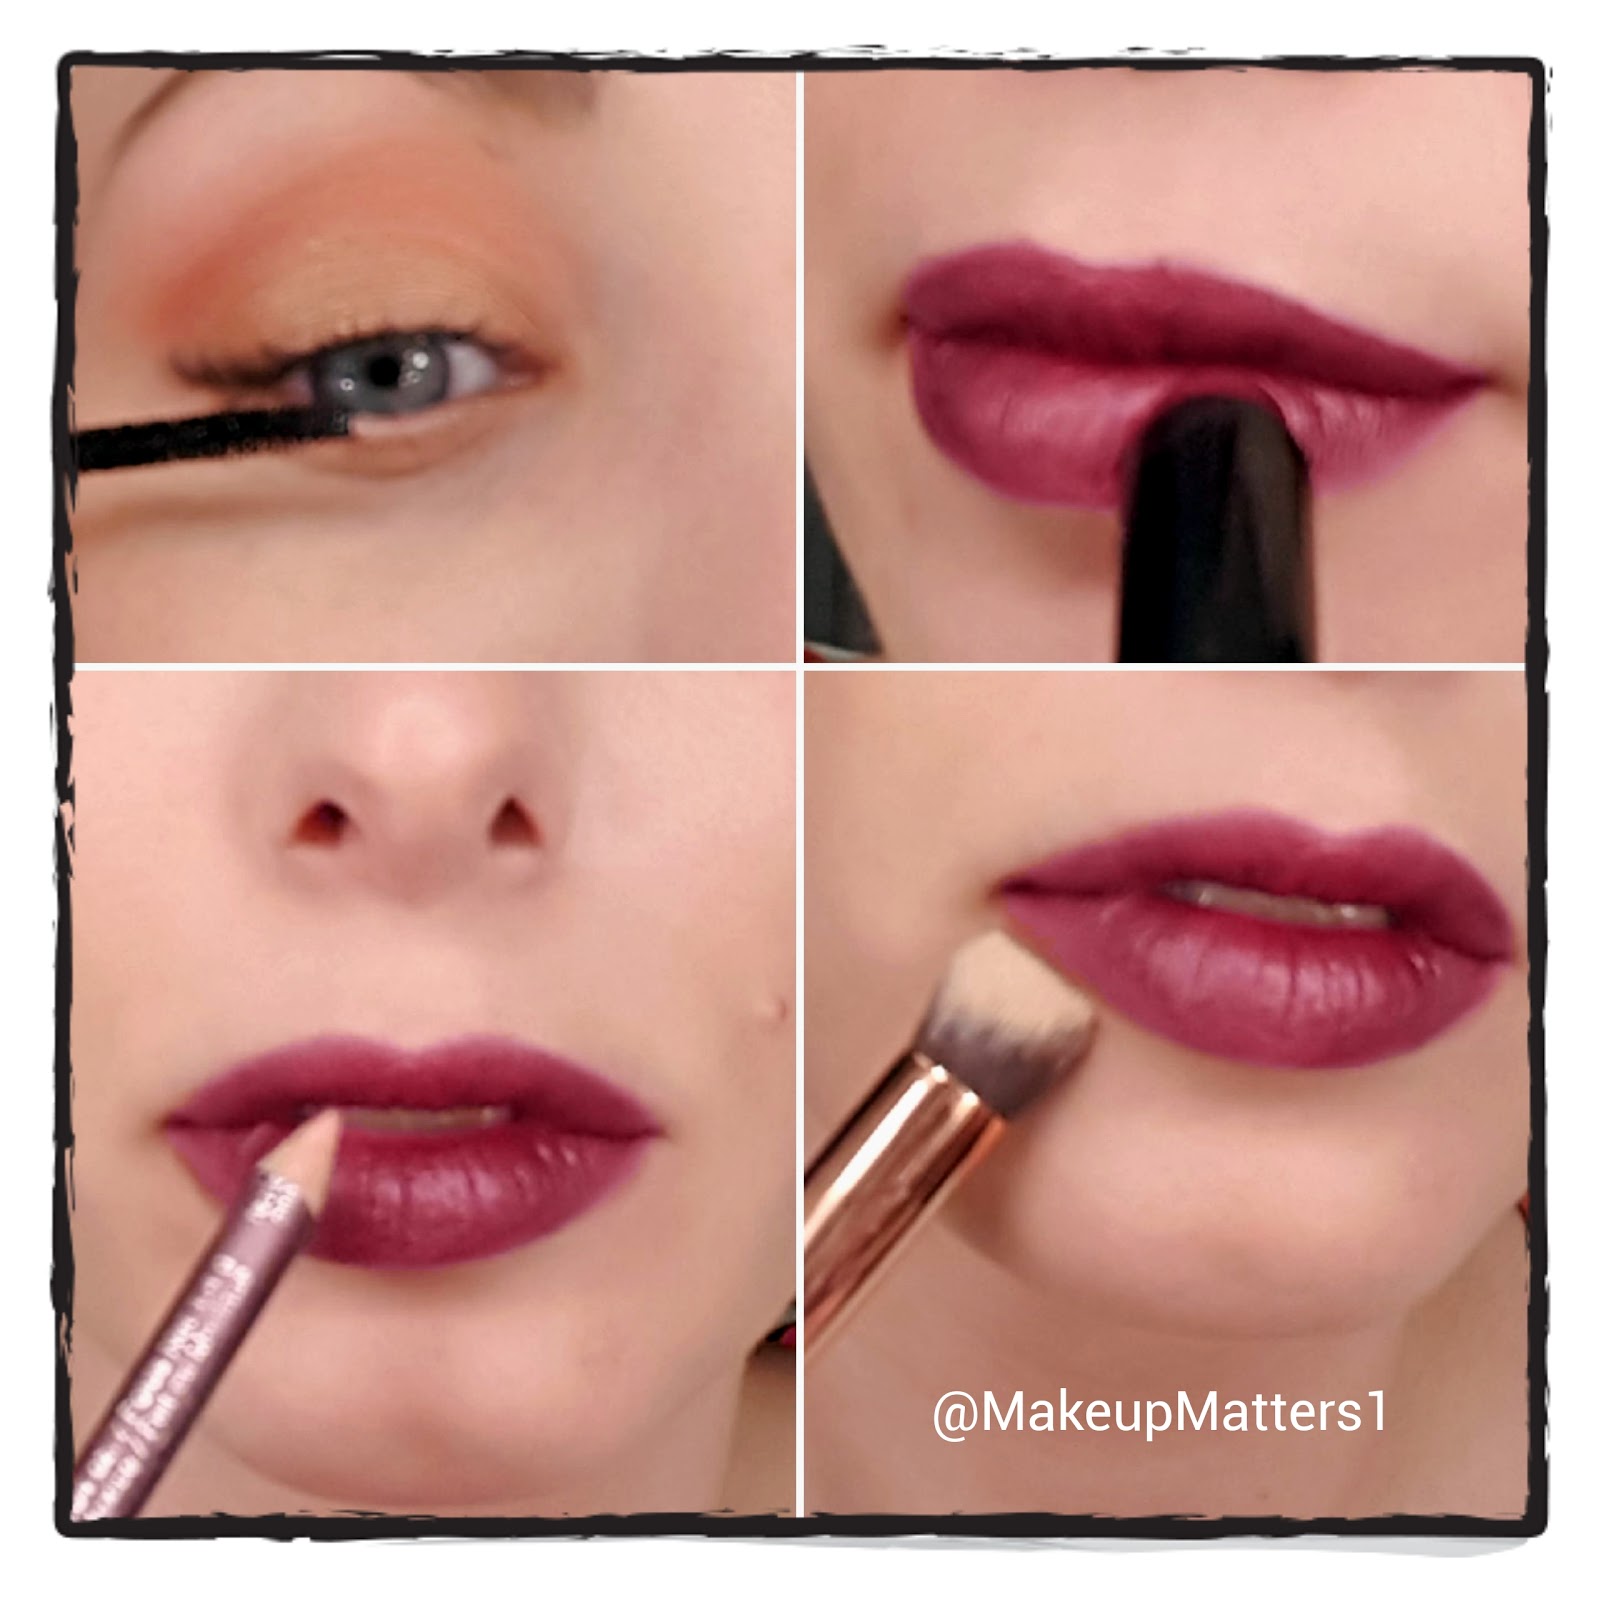
To complete the eyes, I curled my eyelashes and then applied my new megaslim Skinny Mascara (waterproof) from the brand to top & bottom lashes.
Wet n Wild does lip colors really well in my opinion. Ever since M.A.C. stopped being cruelty-free, Wet n Wild has been a top brand for me to find lipstick dupes from. They sell many different colors and formulas when it comes to lip color options.
I decided to go for a bold lip, and used Wet n Wild Coloricon lipliner in #666 Brandy Wine. On top of the liner, I applied Cherry Bomb lipstick straight from the tube. To clean up the edges, I picked up the brush that I used to blend out my under eye concealer, and just using the left over product on the brush, traced around my lips for a more precise line.
Here is the final look:

What do you guys think? Do you want to see more one brand tutorials? Tell me how you like to get Wet n Wild in the comments below.
I definitely love wet n wild as they were also one of my first makeup purchases. The white eyeliner looked killed it. :)
ReplyDelete